Owl Unit

Amidst all the bitter cold days and snow, my class has been learning about owls for the last few weeks. We looked at the parts of the owl, their habitats, and distinctive characteristics that set them apart from other birds and even other owls. My kiddos loved this unit! I thought dinosaurs were a hit but owls were a big hit with this group of kiddos. I wanted to do another big science experiment with my class so I began researching owl pellets. I found this book called Owl Puke that came with an owl pellet so I found a bundle on Amazon and I ended up with 5 pellets to use in my classroom.


The day of the experiment we began by talking about the anatomy of the prey. (Of course the kids think it is gross and great when you tell them they will be working with owl puke!) I pulled out my pop-up Human Body book and we looked at human bones. {I scored this book at B&N years ago for only $5! Check their clearance items when you go!}


We also looked at X-Rays of different body parts to help put in perspective what we would be looking for. {I scored this amazing kit at Ollie's for $4. I simply LOVE a good bargain!}


Each group's materials:
  • butcher paper
  • washable markers
  • paper plate
  • 2 plastic spoons
  • toothpicks
  • bone identification worksheet
  • owl pellet

    These anchor charts are hanging in our classroom window as reinforcement.


The students were under strict instructions that they were allowed to touch the pellet but could not touch their face or mouth after beginning the dissection. They were encouraged to use communication strategies while talking to one another as they broke apart their owl pellet. They began to pull the bones out of the pellet and set those on the butcher paper while the other materials were left on the plates.


 Once all of the bones were removed the students began to identify their bones. Many of them drew circles around the bone and began to label.


We did a comparison of each owl pellet by having members of each team state what they believed their owl ate and the evidence to support their conclusion. I loved that I was able to tie in text features with the anatomy diagrams.


**All students have given written permission to have their photos used in this blog.**


We just had a text feature component on our reading test yesterday. It was like watching light bulbs go off when I said the word diagram. Several students said, "Hey, Mrs. Hawley we just talked about that!" Hello, how awesome is that?! Finally, we did a walk through/gallery style and they were able to look at the other groups discovery. Fantastic way to end a short week and gear up for a new animal unit!

Let the FUTURE generation be heard...

I think the month of February is my Achilles heel during the school year. Don't get me wrong, I love the activities that go along with the month...BUT there are SO many to squeeze in such a short month! I was trying to be proactive and get our President's Day writing activity done ahead of time. I found this adorable little plastic top hat from the Dollar bin at Target last fall. It was supposed to be part of a Halloween costume for my oldest but well...that was not what he had in mind:) Go figure, kids have opinions and aren't afraid to express them.


I had each of my kids stand against the door with our little hat and they pointed at the camera as if they were posing for their ad campaign. They had to write what they would do if they were president. Some of their thoughts on what a president really does was priceless.


**All student's used have given their written permission for their photograph to be used on this blog.**
 
In each of their writing, I was looking for:

  • CUPS (capitalization, sentences making sense, punctuation, and proper spacing)
  • staying on topic
  • 5 sentences
I did a comparison of a few famous quotes from past (and present) leaders and then marked what our future leaders had to say. I think they turned out pretty darn adorable!! Look out world, the new generation has some things to say!


Our quotes came from George Washington, Abraham Lincoln,
Theodore Roosevelt, John F. Kennedy, Ronald Reagan, and Barak Obama.
 

Phonics Practice with FELT...that's right old-school FELT!!!

I don't know if you have inherited any little treasures from a retired teacher or not. If you have you probably inherited many felt pieces in all different shapes, sizes, and colors. I have had these pieces for 6 years and did NOT know what to do with them but held onto them for that "someday I will need them and wish I had them" moment.

Today it came.

I was reviewing my student's assessments on long/short vowel and realized many of them needed an extra review. After speaking to my neighbor across the hall, she told me about Letters Training she went to and an idea to practice decoding words with felt. From there, my lesson plans went out the window (Well, actually we were supposed to have a field trip but after a 2 hour delay due to ice we cancelled!)

Each student received 3 pieces.
  • a green triangle
  • a yellow square
  • a red apple

Each shape/color was to identify a beginning, middle, or ending sound.

At first, I said a word and isolated a sound (beginning, middle or end) and had them touch the felt that matched the sound I gave. For example, the word stick (st-i-ck) and the students were to find the sound /ck/ they would point to the red apple because it was the ending sound.

Sounds easy, right? The first few were a piece of pie and then I threw in blends and they became more challenging. It didn't take too long and the little darlings were catching on. I took it one step farther and we took away the red apple and use the green triangle for short vowels and the yellow squares for long vowels. I started by writing a word on the board and they read it to me then identified whether the word was short or long. Then I simply said the word (to eliminate them relying on spelling patterns) and they had to identify: short or long.

After about 15 minutes of review, they seem much farther ahead this morning than they were last week so mission accomplished! I also made these lollipop response sticks years ago (I cannot remember the source on TpT) and we have used these as a re-teaching tool as well.


Any strategies you would like to share that work in your room??

MLK: How are YOU helping others?

As relaxing as Christmas break is, it seems once you come back to school you have to hit the ground running. Well, we've been really moving in Room 238. As the birthdate of Martin Luther King is rapidly approaching, I wanted to do something a bit different in honor of this man. Many times students will write about their own dreams. While this is exciting and a fantastic way to encourage children, I wanted to have my students put themselves on the back burner and focus on...yes, you guessed it others.

We read a few books about Martin Luther King and the sacrifices he made during his lifetime and the goals he wanted to accomplish. We spoke on how he solved problems without the use of violence but through peace and example. I love that about him!
 

I took a picture of each student and had them create a ''thoughtful'' expression for the photo. They were to answer the question HOW DO I HELP OTHERS? I did an example on the board with guidelines on what I expected from their writing:
  •  5 sentences
  • CUPS {Capital letters, understanding or making sure the sentences make sense, punctuation, and proper spacing}
  • Finally, their writing had to be NEAT!


These are a few samples that are posted out in our stairwell. Yes, I said stairwell not bulletin board. My classroom does not have a wall nearby to post student work but I quickly solved that problem. I took over a nearby stairwell and made it come alive with student work. The students get so used to seeing their work that when it comes time to take it down, they realize how plain and boring the stairwell becomes. :) Fantastic motivation to do even MORE writing projects!!


I love how the black and white photos pop with the bright colored backgrounds. They turned out fantastic and the best part was the students moved through the drafting stage FASTER than ever before!! Maybe break was beneficial in more than one way!!
 
How do you help others??

**All students posted have given their written permission to have their photograph published on this blog.**
 

Marshmallow and Gingerbread Funtivities

I know this is a little late...BUT better late than never, right?! At the beginning of December, I signed my class up for a fabulous "pen pal" exchange with SimplyKinder. Our students were assigned a class within the US and each class was to create a gingerbread boy/girl and write a story to their new friends. The kids were thrilled with the idea of writing to boys and girls their age in Arizona. We spent days writing our stories and going through the writing process and creating gingerbread characters. I saved the package from our friends until our Christmas party. The students read their stories aloud to share with their class. I saved a copy of their own stories so they will have both gingerbread "exchanges" to read from their own portfolio that are kept in the class. (All writing projects are kept in a portfolio and sent home on the last full day of school. It is fabulous to watch them see their writing improve throughout the year because we WRITE A LOT!!!)

Who doesn't like marshmallows?? We had some leftover mini ones from our Polar Express Hot Cocoa Party and I was thinking of creative ways to use them in different games. I found a few ideas on Pinterest I thought we would try.

 The students had to stack marshmallows to create a snowman without falling down in 1 minute.


They had to transfer marshmallows from their desk using a straw (but NO hands) into a cup. I made it even more difficult and they had to move them from their chairs to the cup on their desk. Talk about a quiet couple of minutes! They couldn't talk because the straw was in their mouth and they were completely focused on their task!


Finally, they had to draw a Christmas scene on a paper plate that was sitting on their head.


 Lots of fun and giggles before the holiday break! Thanks for following along!!

Shades

Do the questions about different races, ethnicities, and backgrounds ever come up in your classrooms/homes? I teach in an inner-city district where we have many different minority groups and ethnicities that make up the framework of our district's children. Every once in a while I have a group of students who are very curious why  we are all a little different. What are your responses to those questions? I know EXACTLY what I would say when I am teaching Sunday School or what I would say to my own children. But in a public school setting...it's well a little different.

Without going into detail, one of my students didn't want to sit next to another due to the difference between their skin. My policy in my classroom has always been that skin color DOESN'T matter. I don't look or judge them according to the color of their skin. I love them all for who they are on the inside.

I always use this opportunity to bring up the book A Bad Case of Stripes  and ask my students if I came into school with stripes all over my skin would that change who I was on the inside?  Would I still be their teacher with crazy curls? Yep. Our skin is our body's LARGEST organ that is integral to keeping out germs and protecting us from harm and keeping our internal organs safe. I explain that it's not the wrapping that we really care about but what the wrapping is hiding (the inside!) that counts.

When I got home, I was still thinking about what had happened in my room while making dinner. Our not so cute chicks (let's face it they are awkward adolescents at this point) are finally laying eggs and we are LOVING having farm fresh organic eggs right in the back yard. I looked down at the carton of eggs my hubby had washed the night before and this is what I saw. (Ignore my ugly counter top, my kitchen is still in the stages of being remodeled!!)

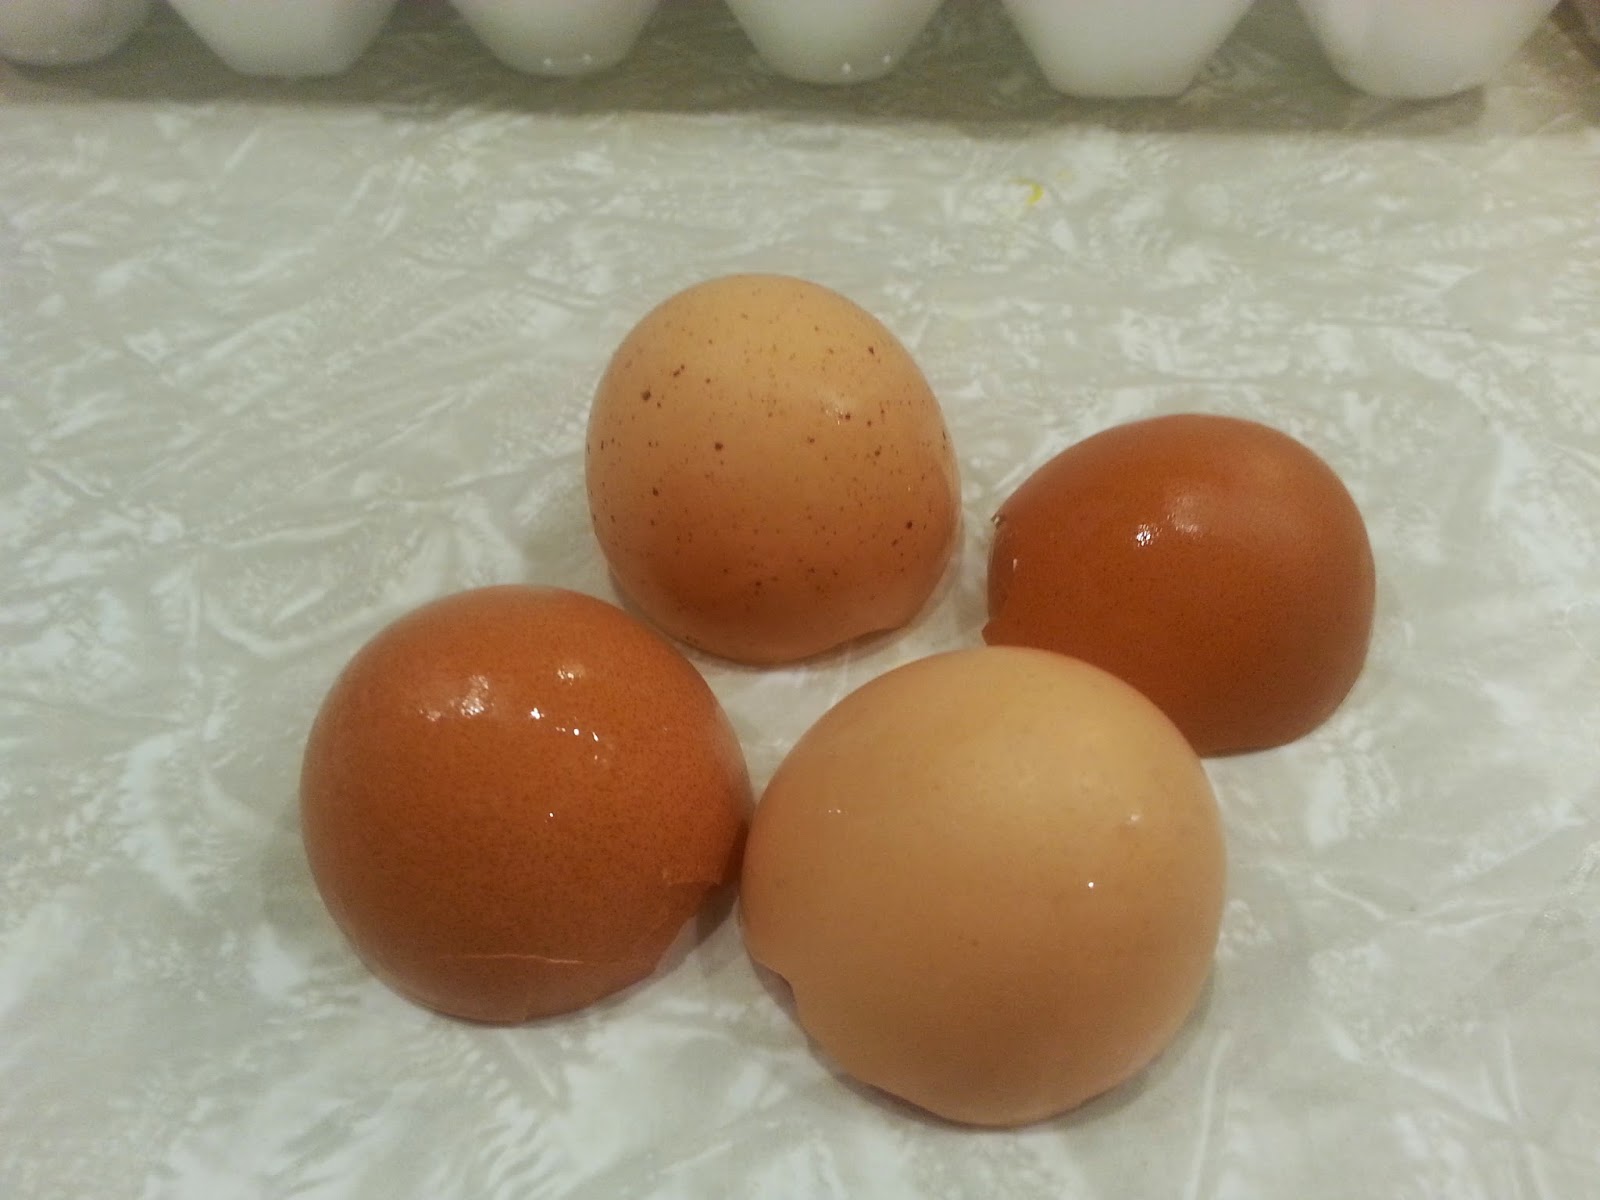
I had pieces of egg shells lying on the counter. All different shades. Some light. Some dark. Some with speckles. Some with spots. Once they were all cracked open and on the griddle, they all looked the same and I couldn't tell which egg came from which shell.


I showed this to my class to make a point the next day. I don't like one chicken better than the other for the color of the shell because the shell isn't what I care about. I love each of them for who they are as a person and if they walked in with stripes, polka dots, feathers, or fur I wouldn't care.

We were made perfect in His image and if He thinks we are perfect just as we are...who am I to judge?


Frozen Themed Pom-Pom Garland

I swear Christmas sprung up on me. Does anyone else feel that way too? If you don't, I'm seriously envious, annoyed, jealous I don't know how you do it! I have all my shopping, wrapping, and baking done but it feels like it was just the start of the school year.
My previous garland did not survive the last family move. When I went to pull it out of storage last Christmas, the box had gotten wet and my beautiful ruby beads were moldy. Serious disappointment. I thought it would be fun to have a bunch of different garlands I could use on both my indoor and outdoor trees. So I'm starting to create them. ONE. AT. A. TIME. I mean it's hard when you have a 3 1/2 year old, a 5 month old, and your parents and sibling are currently living in your house to get really creative!
I saw tutorials on making pom-pom garlands and I wanted to make one that looked like Frozen (yep, my boys LOVE Frozen!!) and have a little fun this year.

Here's what you need:

2-3 spools of yarn (Depending on how many strands you want to make, I used 3)
scissors
twine, rope, or extra yarn
plastic bags (for all the little pieces you don't want all over the place!)


This is the brand I purchased from Wal-Mart.

Step 1: First, I read if you use a fork it helps keep things organized. While this is true, the pom-poms are REALLY small so I used all 4 fingers to wrap the yarn around. I looped around about 50 times (give or take) and then gently slid the yarn off my fingers and cut a piece of yarn about 6 inches or so and tied a knot around the middle making the yarn look like a bow. I tied a knot and then looped the pieces around the opposite side and double knotted the yarn again. I wanted them SECURE.
I did this right on my lap and had no problems with the yarn falling apart.


Step 2: Cut the looped ends on EACH side. Be careful not to cut the ends of your string that formed the knot. You'll need those later. Be sure to hold the center where the knot is tying the strings together.


Step 3: While holding the fanned out pieces, trim the edges in a circular pattern. (Great time to use those trash bags!)

Step 4: Repeat the step with as many pom-poms as you wish.

Step 5: Tie the pom-pom onto your string/rope and arrange with as much/little spacing between as you wish.


Step 6: Add to the tree. Step back. Admire your craftiness!


What does your Christmas garland look like?